Layer Creation
The Create New Dip Strike Layer tool provides an easy way to set up properly configured vector layers for geological data collection. This tool ensures that your layers have all the required fields and appropriate settings for strike and dip measurements.
Note
Creating a new layer is not strictly required for using the plugin. You can work with any existing point vector layer, and the plugin will automatically check and configure field mappings when you select an existing layer. The layer creation tool is provided as a convenience for users who want optimally configured layers from the start.
Accessing the Tool
Click the Create New Dip Strike Layer button in the Dip Strike Tools toolbar
Or access it through the plugin menu in QGIS
Layer Creation Dialog
The layer creation dialog allows you to configure all aspects of your new geological data layer:
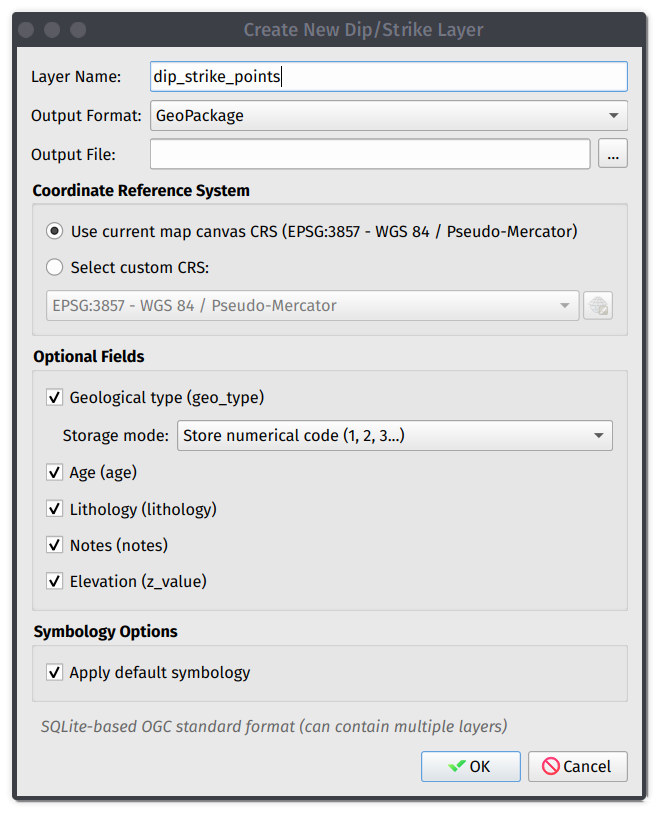
Layer creation dialog
Basic Settings
Layer Name
Enter a descriptive name for your layer. The name will appear in the QGIS Layers panel.
Layer Type
Choose from three storage options:
Memory Layer (Temporary): Fast creation and editing with data that exists only while QGIS is open. Ideal for quick analysis or temporary data collection, and can be saved later using QGIS “Export” functionality.
Shapefile: Traditional GIS format compatible with most GIS software. Field names are limited to 10 characters and the plugin automatically uses field mapping for compatibility.
GeoPackage: Modern SQLite-based format supporting longer field names and more data types in a single file that contains all data and styling. Recommended for new projects.
Coordinate Reference System (CRS)
Current Project CRS
Uses the same coordinate system as your current QGIS project, ensuring compatibility with existing project data. This is recommended for most use cases.
Custom CRS
Select any coordinate reference system when working with specific regional grids. Both geographic (lat/lon) and projected coordinates are supported.
Field Configuration
The plugin automatically creates the required fields for geological measurements:
Required Fields
The plugin creates three essential fields: Strike Azimuth for the direction of strike line (0-360°), Dip Azimuth for the direction of dip (strike + 90°), and Dip Value for the angle of dip from horizontal (0-90°).
Optional Fields
Enable optional fields based on your data collection needs. These include Geological Type for classification of the measured feature, Age for geological age or formation name, Lithology for rock type or lithological description, and Notes for additional comments or observations.
Geological Type Configuration
When you enable the Geological Type field, you can choose the storage method:
Store Codes
Saves numerical codes (1, 2, 3, etc.) which results in smaller file size but requires reference to decode meanings and is used with lookup tables.
Store Descriptions
Saves full text descriptions (e.g. “Strata”, “Foliation”, etc.) which creates self-documenting data that is immediately readable but results in larger file size.
Tip
The geological types are defined in the plugin settings and can be customized for your specific workflow.
Symbology Options
Apply Default Symbology
Automatically applies geological strike/dip symbols using traditional structural geology conventions with strike lines and dip tick marks.
No Symbology
Creates layer with simple point symbols, allowing custom styling later and is useful when integrating with existing style schemes.
Layer Creation Process
Configure Settings: Fill in all required settings in the dialog
Click OK: The plugin creates and configures the layer
Automatic Setup: The layer is added to your QGIS project, configured with proper field mappings, marked as a dip/strike layer for the plugin, and styled (if symbology option selected)
Next Steps
After creating your layer, you can start data collection using the Create Dip Strike Point tool, import existing data by copying features from other layers, configure styling to customize the appearance, and set up your project by adding base maps and other reference layers.
See also
For advanced field mapping and configuration options, see the Data Insertion documentation.