Plugin Settings and Customization
The Dip-Strike Tools plugin provides customization options through QGIS’s integrated settings system. This page covers all available settings, customization options, and configuration workflows.
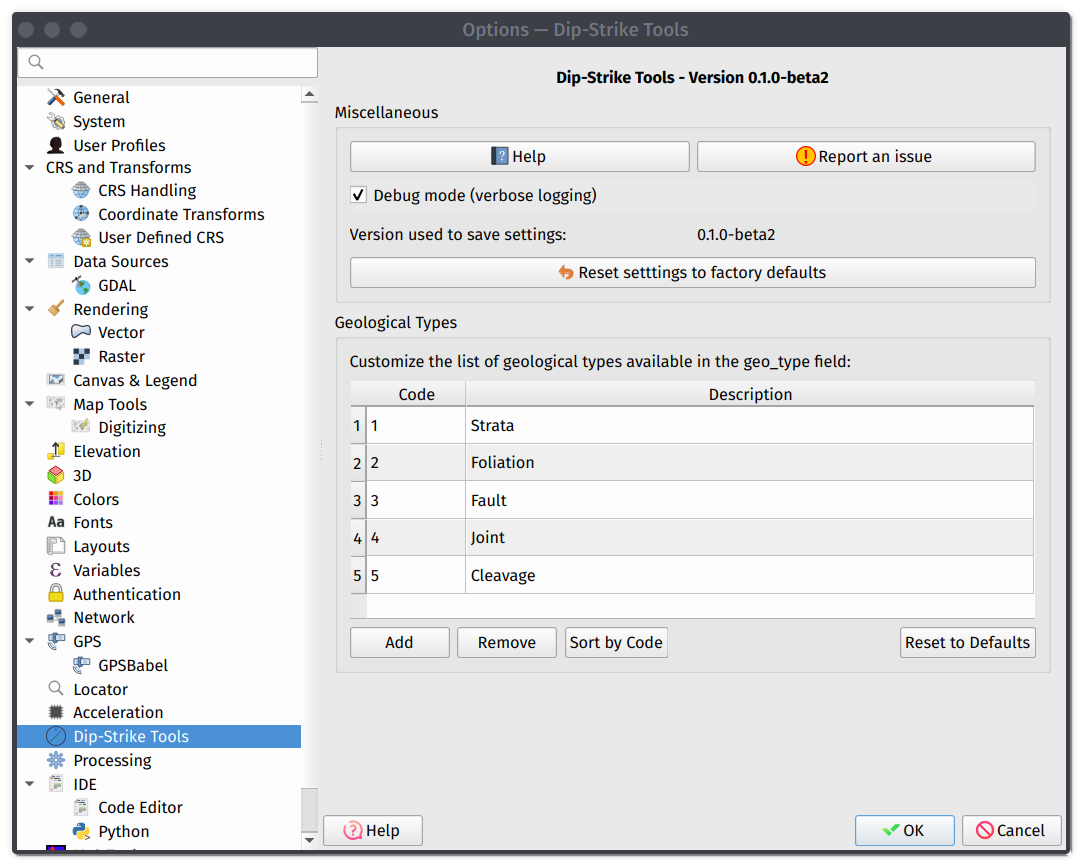
Accessing Plugin Settings
The plugin settings are integrated into QGIS’s main Options dialog. Access plugin settings by going to Settings > Options... in QGIS menu, navigating to “Dip Strike Tools” in the left sidebar, or using direct access through the plugin’s main menu.
Field calculator tool
Debug Mode
Enable detailed logging for troubleshooting and development purposes.
Note
When to Enable: Use debug mode when investigating plugin behavior issues, reporting bugs to developers, or understanding plugin operations in detail.
Effects: Increases log output verbosity, may impact plugin performance slightly, and provides detailed error information.
Usage: Enable temporarily for troubleshooting, disable for normal daily use, and note that it’s required for meaningful bug reports.
Geological Types Management
The plugin provides a system for managing geological classification types used in data collection and analysis. The default classes can be customized.
Adding New Types
Access the geological types management table, click the “Add” button to add a new type, provide a short unique code (numbers or letters), add a clear descriptive name, and apply settings to store the new type.
Editing Existing Types
Select the row for the type you want to modify, double-click to edit code or description, ensure codes remain unique, and apply settings to save changes to update the system.
Removing Types
Select the type to remove, click the “Remove” button, confirm the action when prompted, and save changes to apply settings making removal permanent.
Warning
Removing geological types may affect existing data that uses those classifications.
Resetting to Defaults
To start fresh, use the “Reset to Defaults” button, confirm the action by acknowledging the warning dialog, review that default types are restored, and customize again by adding your custom types as needed.
Geological Types in Data Collection
When collecting data, geological types appear in the dropdown lists in data entry dialog.
When you enable the Geological Type field in layer configuration, you can choose the storage method:
Store codes: Saves numerical codes (1, 2, 3, etc.) which results in smaller file size but requires reference to decode meanings and is used with lookup tables.
Store Descriptions: Saves full text descriptions (e.g. “Strata”, “Foliation”, etc.) which creates self-documenting data that is immediately readable but results in larger file size.
This choice directly influences the classification that may be used for layer symbology. Plan ahead by designing type systems before starting major projects.